Free Webflow video integration
TL;DR
The Webflow Background Video element can be used as a free video hosting mechanism that serves .mp4 files directly from the Fastly CDN. Compared to YouTube and Vimeo embeds, this approach eliminates external scripts and trackers, which has a direct positive impact on LCP, INP, and CLS. Beyond performance, it eliminates GDPR risks and removes the need for a Vimeo subscription for short production videos. The optimal solution for hero videos, testimonials, and short product demo clips on SaaS and marketing sites
Webflow Video Hosting: The Trick Most Developers Don't Know
Most Webflow teams handle Webflow video content the same way: they record a video, upload it to YouTube or Vimeo, copy the link, and paste it into their site. That approach works, but it carries hidden costs that many teams don't notice right away, financial, technical, and those that affect the user experience.
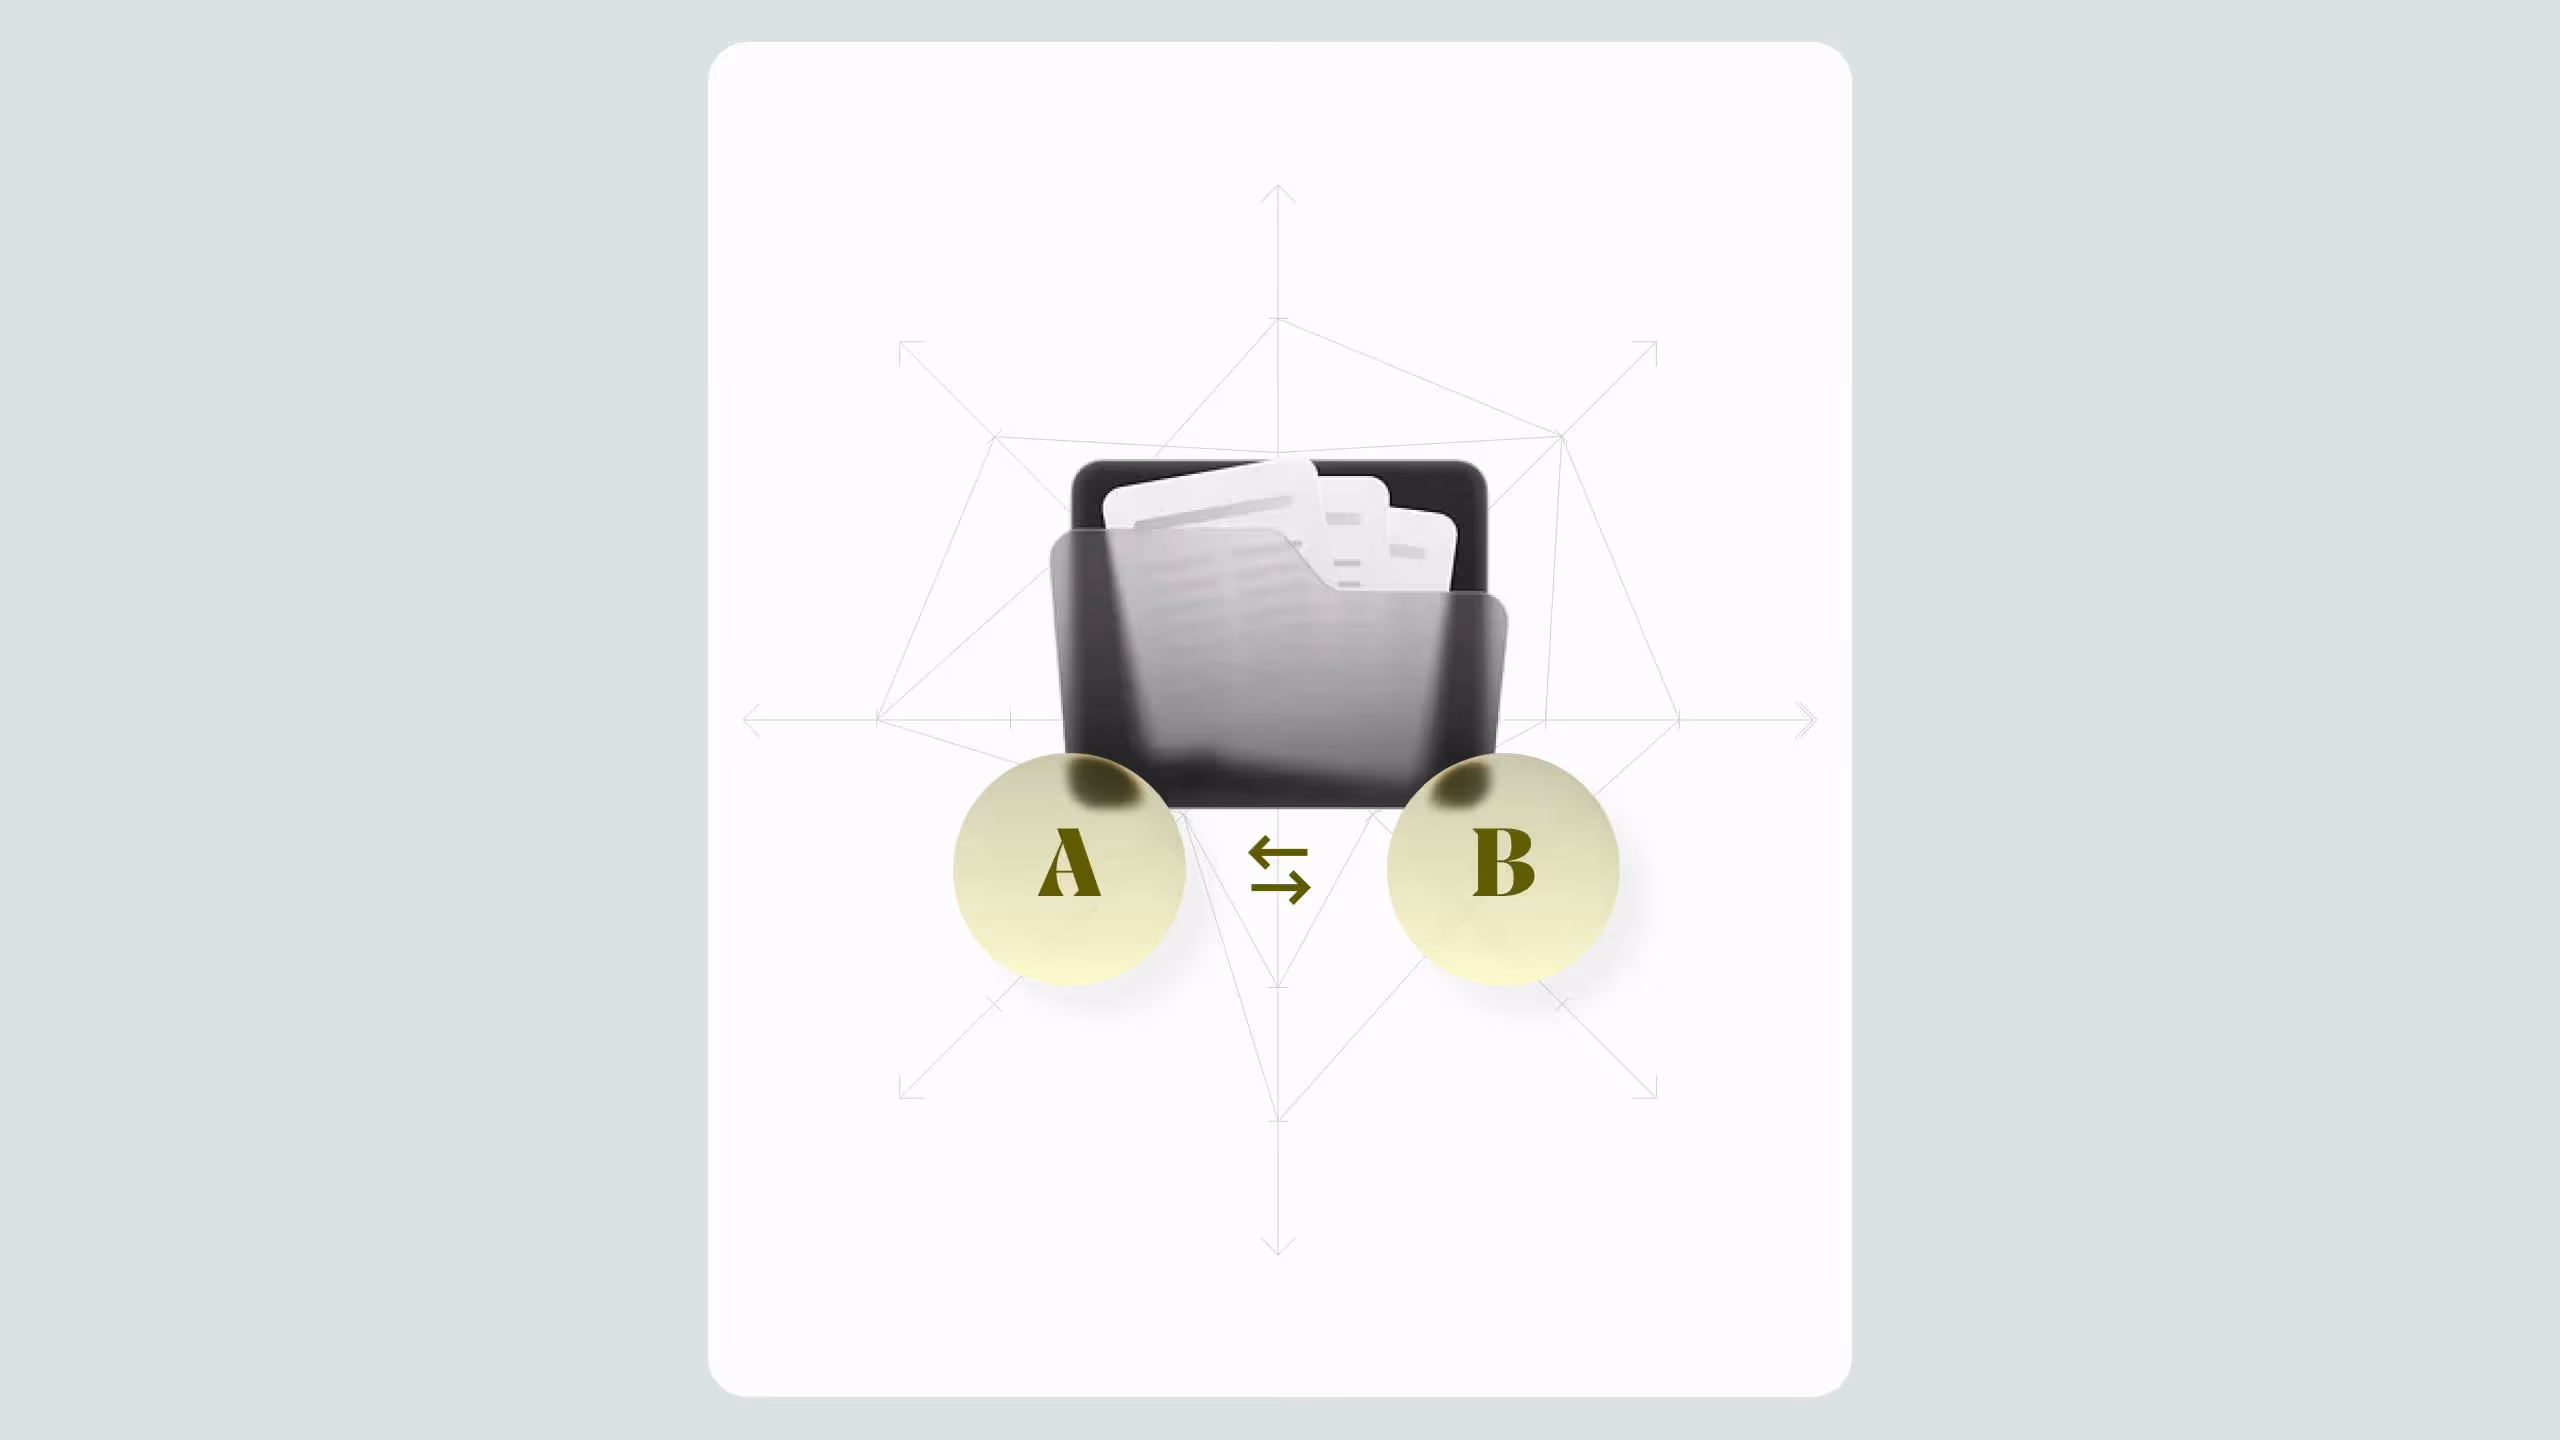
There is a different approach. The Webflow Background Video element, mostly known as a tool for decorative backgrounds, can serve as a real video hosting mechanism. The principle is straightforward: on a separate page inside Webflow, you add a Background Video element, upload an .mp4 file, and get a stable CDN URL. You then use that URL inside a custom HTML5 video player on any page of your site, without any third-party platform. In the sections below we explain why this approach is worth your attention, and you will find the step-by-step implementation with code in a dedicated section at the end of the article.
Why the Standard Approach Has Problems
When you embed a YouTube or Vimeo video on a Webflow site, you are not just embedding a video. You are embedding the entire ecosystem of that platform along with it.
A YouTube iframe loads dozens of external scripts and trackers the user never asked for, and each one costs time. YouTube shows recommended clips at the end of the video, often from competitors, and there is no way to fully remove that on the free plan. Vimeo solves this, but you pay for the privilege.
On top of that, when a visitor loads a page with a YouTube embed, Google collects data about that person even if they never clicked the video. This is an area where European regulators have already issued fines and one that is becoming increasingly sensitive for companies operating in the EU.
Why the Webflow Video Native Element Is Not the Answer Either
The natural reaction to the problems with YouTube and Vimeo embeds is to use Webflow's built-in Video element. But that hits a wall too.
The Webflow Video element gives you no control over how the video loads and behaves. Specifically, you are missing the following:
- Preload control. You cannot set the preload attribute, so the browser decides on its own when and how much video content to load in advance, often at the expense of page speed.
- Lazy load. The video loads immediately when the page opens, even if the user never scrolls down to it.
- Poster image. You have no control over which image is shown before the user starts the video.
- Autoplay and buffering strategy. You cannot fine-tune when and how the video activates.
All of this directly affects Core Web Vitals. A video that loads without control can be one of the biggest causes of a poor LCP score, especially on mobile devices.
A custom HTML5 video player, on the other hand, gives you full control. You can set preload="none" so the browser does not load the video until the user initiates playback, add lazy loading logic, and optimize the entire experience to fit your site's needs.
What is the Webflow Video trick? The Webflow Background Video element allows direct upload of .mp4 files to Webflow infrastructure. Once uploaded, the video gets a direct CDN URL that can be used inside a custom HTML5 video player within a Webflow Embed element, without Vimeo, YouTube, or any external branding or trackers.
How Webflow Can Take Over That Role
Webflow hosts content on the Fastly CDN network. When you upload an .mp4 file through the Background Video element, that file gets a direct URL that can be used anywhere on the site. You can read more about how Webflow CDN and hosting work in the official Webflow documentation.
Unlike YouTube and Vimeo iframes, a direct .mp4 URL loads as a plain media file. No external scripts, no trackers, no additional DNS calls to third-party domains. That URL is used inside an HTML5 video element within a Webflow Embed block, and the result is a fully custom video player designed to match the brand's visual identity, without any external branding.
Impact on Core Web Vitals and SEO
This is the most concrete reason why this approach deserves attention.
YouTube and Vimeo iframes have poor LCP characteristics because they require a DNS lookup to an external domain, a TCP handshake with an external server, loading of external JavaScript files, and rendering of an iframe inside a sandbox. A direct .mp4 file served from the Webflow CDN eliminates all those steps and directly improves Largest Contentful Paint, especially when the video is above the fold.
Interaction to Next Paint (INP) also benefits because the main thread stays freer without third-party scripts, and Cumulative Layout Shift (CLS) is resolved because an HTML5 video element with explicit dimensions does not cause layout shift on load.
On the SEO side, there is a widespread belief that YouTube embeds help rankings. Google indexes video content based on schema markup and video sitemaps, not based on where the video is hosted. A custom video player with VideoObject structured data gives Google everything it needs. Nielsen Norman Group research consistently shows that users trust content that is visually integrated into the site more than content that looks like an external widget, and Baymard Institute notes that video without external UI elements increases conversion on product pages.
Is Webflow good for video hosting? Webflow is good for hosting short, optimized videos that are part of a marketing or SaaS site. Unlike YouTube and Vimeo embeds, a direct .mp4 file has no external scripts or trackers, which positively affects LCP, INP, and CLS. It is not recommended for long videos or content that requires video analytics.
Comparison: Webflow vs Vidzflow vs Vimeo vs YouTube
The Webflow native trick and Vidzflow share the same key advantages: no third-party branding, no GDPR trackers, excellent LCP. The difference is in complexity and functionality. The Webflow trick requires writing code for a custom player but costs nothing extra. Vidzflow is a paid service that offers visual management without code, video analytics, and lead capture.
What Type of Webflow Video Content This Works For
Good candidate for Webflow video hosting:
- Short production videos from 30 seconds to 2 minutes, such as product demo clips and explainer videos
- Customer testimonials displayed directly on landing pages
- Onboarding videos inside a SaaS product
- Background loop animations without sound as a visual design element
Poor candidate for Webflow video hosting:
- Videos longer than 5 minutes because the file size quickly exceeds upload limits
- Video libraries with many files due to unpredictable bandwidth consumption
- Content that requires detailed analytics on views and engagement
- Videos that change frequently because every reupload generates a new CDN URL
How To Set Up This Webflow Video Trick On Your Webflow Site
Now that we understand why this approach is worth using, let's implement it.
1. Create a separate page for the video library
In Webflow Designer, create a new page with the slug /video-library and set it to No-index in the SEO settings.
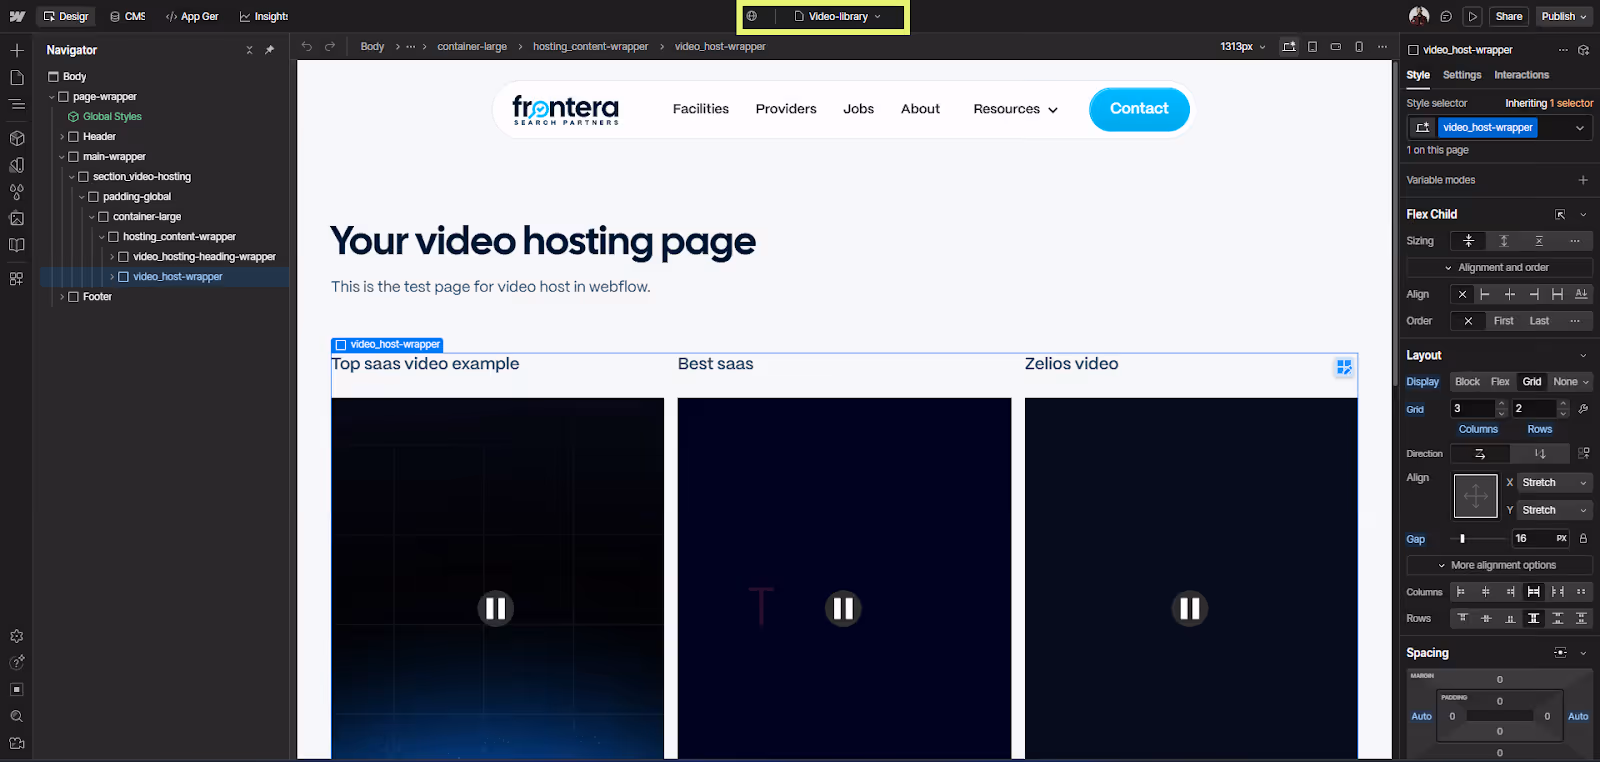
2. Add a Background Video element and upload the file
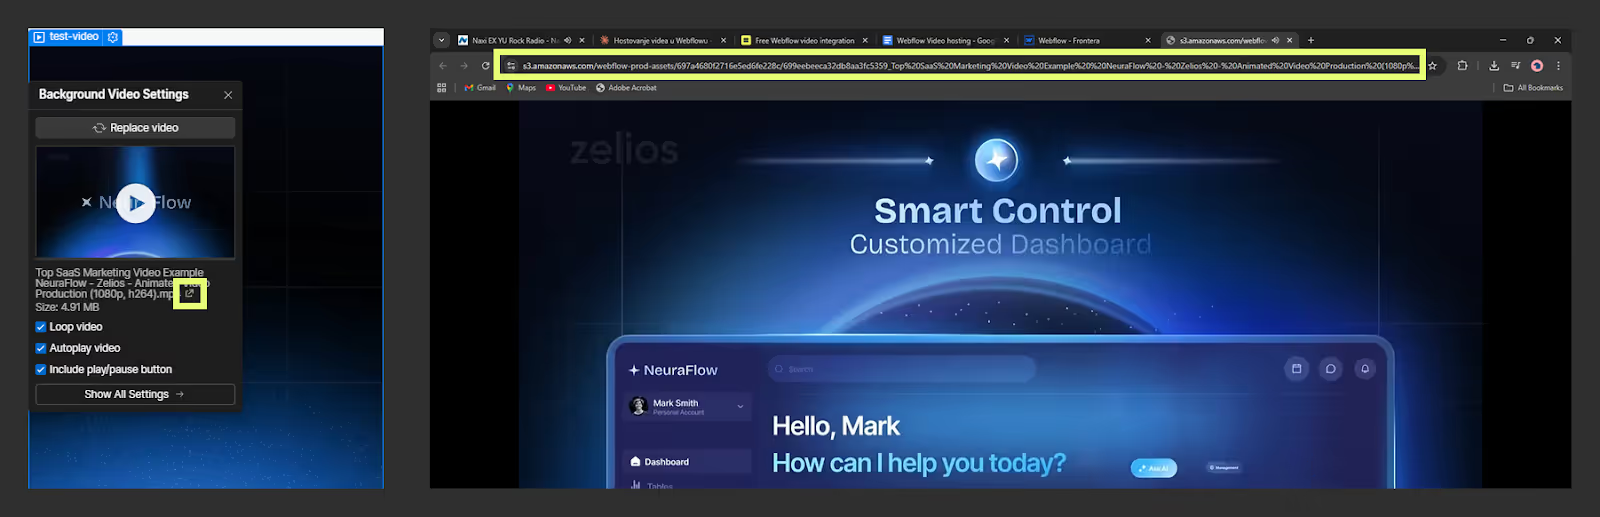
Add a Section to the page, place a Background Video element inside it, and upload your optimized .mp4 file. Publish the site because the CDN URL is not active until the site is published.

3. Copy the video link.
In Webflow Designer, next to the name of the uploaded video in the Background Video element, there is an icon to open the video in a new window. Click it and copy the URL from the browser's address bar.
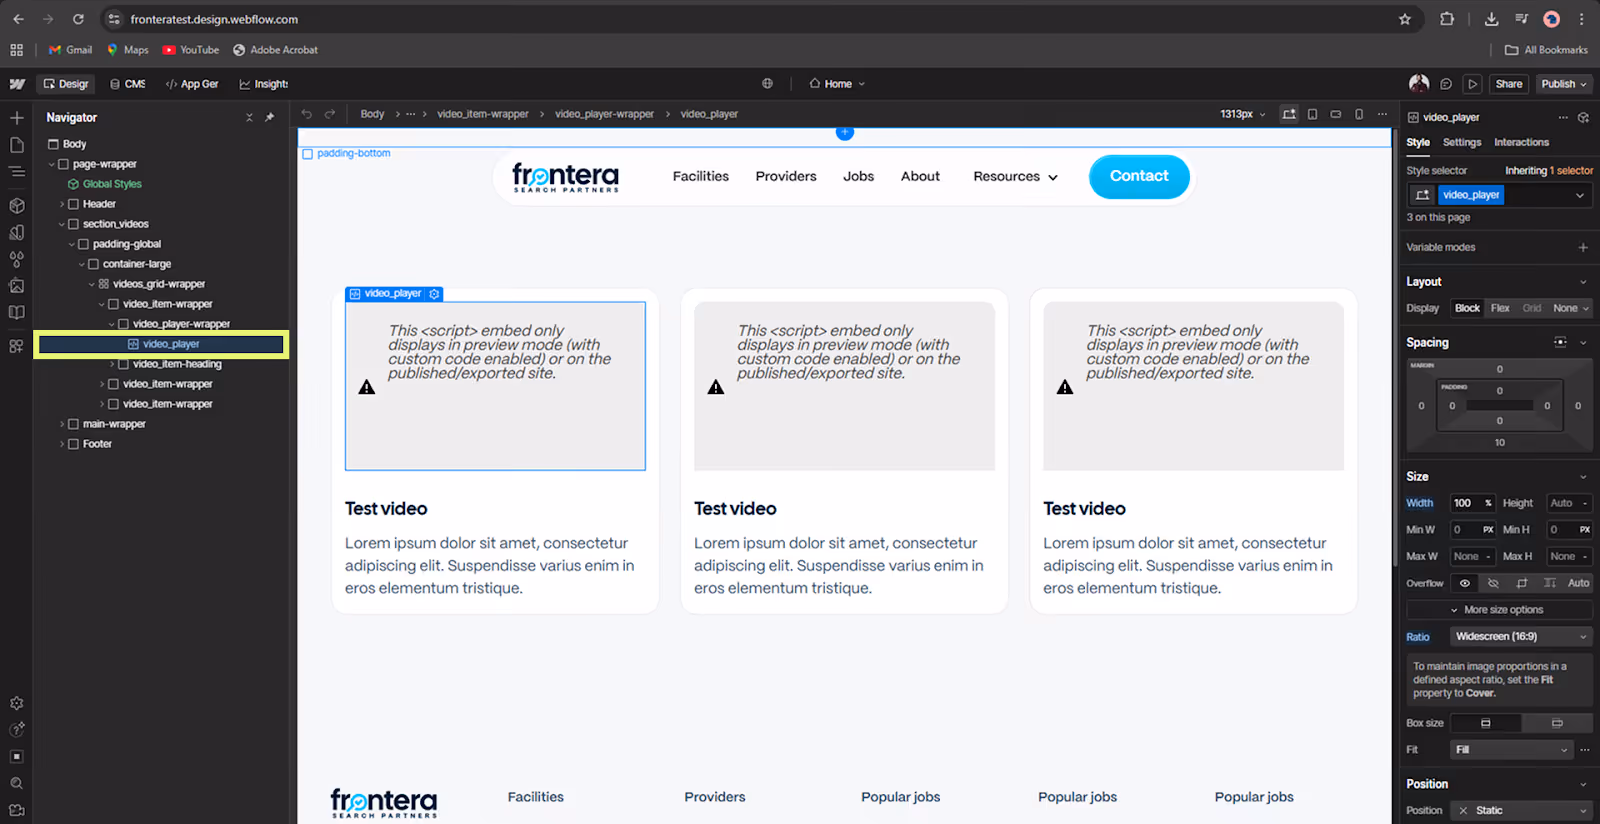
4. Add a custom video player inside an Embed element
On the page where you want to display the video, add an HTML Embed element and paste in your custom video player code. You will find the complete ready-to-use code at the end of this tutorial.
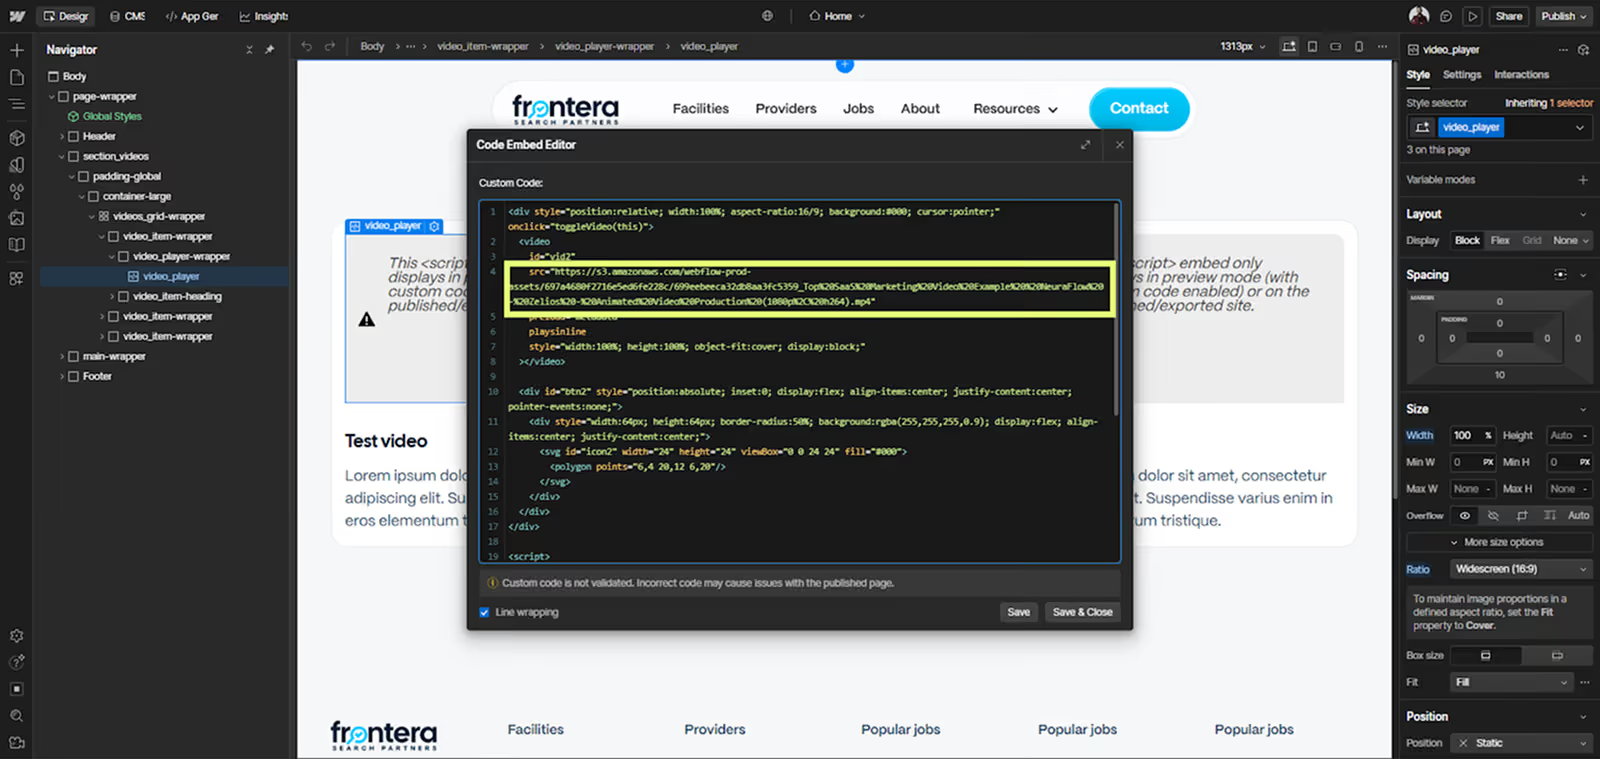
5. Paste the video link into the player. Inside the embed code, find the source src tag and paste the CDN URL from step 3.
6. Publish and verify
Publish the site, open the page in a browser, and confirm that the video loads and all controls work correctly.
How do you add a custom video player in Webflow? A custom video player is added through an HTML Embed element in Webflow. Inside the embed element you write an HTML5 video tag with CSS styles and JavaScript controls for play, pause, progress bar, and fullscreen. The video source is the direct .mp4 URL obtained from the Webflow Background Video element on a utility page of the site. If you don't want to deal with the code yourself, we have prepared a ready-to-use template below. All you need to do is paste the code into an Embed element and replace the src tag with your Webflow CDN URL. The code serves as a foundation that you can freely extend and customize if you need additional functionality.
<div style="position:relative; width:100%; aspect-ratio:16/9; background:#000; cursor:pointer;" onclick="toggleVideo(this)">
  <video
    id="vid2"
    src="PASTE_YOUR_MP4_URL_HERE"
    preload="metadata"
    playsinline
    style="width:100%; height:100%; object-fit:cover; display:block;"
  ></video>

  <div id="btn2" style="position:absolute; inset:0; display:flex; align-items:center; justify-content:center; pointer-events:none;">
    <div style="width:64px; height:64px; border-radius:50%; background:rgba(255,255,255,0.9); display:flex; align-items:center; justify-content:center;">
      <svg id="icon2" width="24" height="24" viewBox="0 0 24 24" fill="#000">
        <polygon points="6,4 20,12 6,20"/>
      </svg>
    </div>
  </div>
</div>

<script>
function toggleVideo(wrap) {
  const vid = wrap.querySelector('video');
  const btn = wrap.querySelector('[id^="btn2"]');
  const icon = wrap.querySelector('[id^="icon2"]');

  if (vid.paused) {
    vid.play();
    btn.style.opacity = '0';
    icon.innerHTML = '<rect x="6" y="4" width="4" height="16"/><rect x="14" y="4" width="4" height="16"/>';
  } else {
    vid.pause();
    btn.style.opacity = '1';
    icon.innerHTML = '<polygon points="6,4 20,12 6,20"/>';
  }
}
</script>
Conclusion
The Webflow Background Video element is a video hosting mechanism that most teams overlook. For short production videos on marketing and SaaS sites it offers concrete advantages: better Core Web Vitals, simpler GDPR compliance, and full control over the player, with no additional cost. It is not a replacement for Vimeo, Vidzflow, or YouTube in every situation, but for hero videos, testimonials, and short product demo clips it is a solution with measurable effects on performance and user experience.
.svg)
.svg)